


AI Photo Magic Editor
3.632.00 Reviews
App Specs
- Version
- 1.2.0
- Updated On
- License
- Free
- Downloads
- 10,000,000+
- Developer
- Protean Studios
- Categories
- Photography
- Platform
- Android
Screenshots
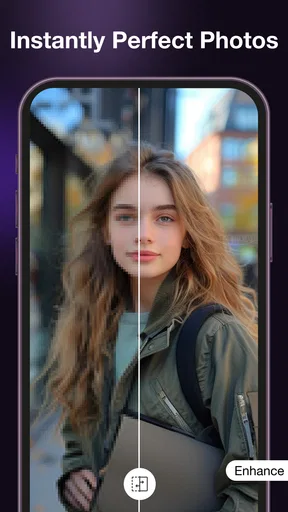
 Analysis by AppCompare
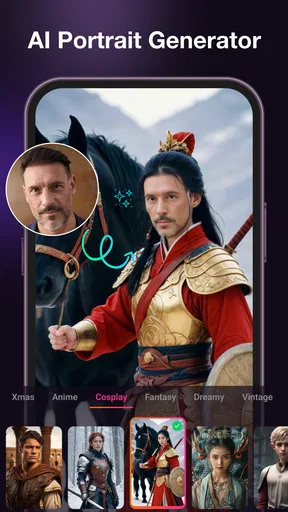
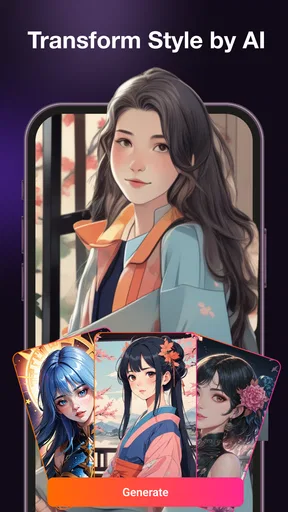
I look at a photo editor by asking a practical question: can it help me turn an ordinary picture into something I’m comfortable sharing, without making the process feel like a second job? AI Photo Magic Editor is aimed at exactly that kind of quick creative work. It focuses on changing portraits and image backgrounds, with the option to turn a photo into artwork. That makes it more of a hands-on transformation tool than a camera app or a full, precise retouching suite.
In my experience, the appeal is the short path from “this picture is nearly right” to a version that feels more considered. I can imagine using it to tidy a casual portrait, give a profile image a cleaner setting, or try a stylized treatment before deciding whether the result is worth keeping. The important distinction is that AI-assisted edits can save time, but they also make choices for you. I’d treat the first result as a starting point, not an unquestionable final.
From a usable photo to a creative starting point
AI Photo Magic Editor is a free photography app from Protean Studios. It has an average rating of 3.6 from around 11,000 ratings, and more than 10 million installs. Those figures suggest a widely tried tool with mixed responses, so I wouldn’t assume it will suit every editing style. Its Everyone age rating also makes it broadly accessible, though anyone sharing edited portraits should still be thoughtful about consent and how a changed image might be interpreted.
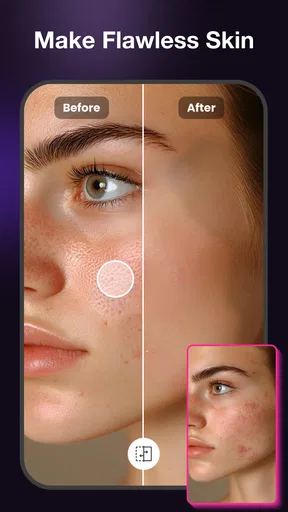
The app’s strongest starting point is a photo that already has a clear subject. Face retouching and background replacement are most useful when the face is visible and the subject stands apart from the surroundings. A well-lit head-and-shoulders image, for example, gives an editor a better basis for a polished profile picture than a dim group photo where hair, shoulders, and background overlap. That is not a promise of perfect results; it’s a useful way to give an automated edit a fair chance.
I’d choose the source image with the intended destination in mind. For a social profile, a close crop and natural expression matter more than an elaborate background. For a personal creative post, an artistic treatment may be the point, so a less formal image can work. If the photograph is important for a résumé, official document, or other setting where likeness must remain exact, I would skip dramatic AI changes and use a conventional editor—or leave it untouched.
One practical tip is to keep an unedited copy before experimenting. That gives me a clean reference if a retouch softens details too much or a replacement background changes the mood in an unwanted way. It also makes it easier to compare versions later, rather than relying on memory. This simple habit is especially valuable when trying several different looks on the same portrait.
Choosing the right job for the tool
The three creative directions—facial retouching, replacing a background, and making art from a photo—serve different needs, and I wouldn’t use them all just because they’re available. A subtle face adjustment can help a casual portrait feel ready to share. Background replacement is more useful when a distracting setting competes with the subject. An art treatment is better understood as a change in style, not as a faithful correction of a photograph.
Worth Reading Before You Choose

Baby Panda World Brings Quick Play to Modern Phones, but Its Game Library Feels Busy

ESPN’s Live Game View Makes Following Close Games Easier

QuizzLand Review: A Good Fit for Short Trivia Breaks, Not Every Player

Basketball Stars: Multiplayer Is Fast, but Can It Recover When Matches Go Wrong?

WEBTOON Turns Phone Updates Into a Better Reading Routine

Link to Windows Runs on Shared Habits, Not Social Feeds
That distinction helps prevent a common editing trap: stacking transformations until the image no longer looks like the person or moment that mattered. I’d begin with the single change that solves the problem. If the room is messy, try the background first; if the image is already clean but feels too plain, explore the artistic direction. For portraits, I’d keep retouching restrained and check whether skin texture and facial features still look believable.
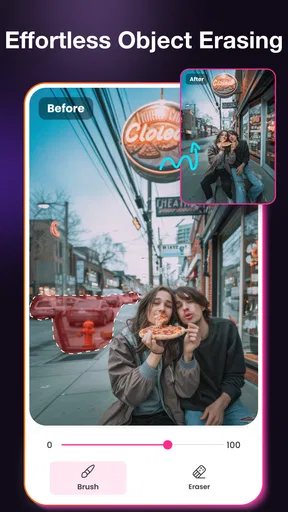
There are cases where this app is not the right starting point. If I need to remove a tiny object precisely, match a brand color, work with layers, or make careful local adjustments, I’d reach for a more manual photo editor. AI-focused tools are appealing because they reduce the number of decisions, but that same convenience can limit control. For detailed product photography or professional client work, I would want a workflow that lets me inspect and refine every edge.
Making an edit without losing the original feel
My preferred workflow is deliberately conservative. I’d start with a clear, single-subject image, make one change, and inspect the result at normal viewing size as well as close up. A replacement setting can look convincing at a glance but reveal an awkward outline around hair or shoulders when enlarged. Conversely, a tiny edge flaw may not matter for a small profile thumbnail. The right standard depends on where the picture will appear.
For a realistic everyday example, imagine taking a quick portrait at home before updating a messaging profile. The lighting is decent, but a busy shelf pulls attention away from the face. I’d try a simpler background, then compare the edited image with the original in the same crop. If the subject’s outline looks unnatural, I’d choose a different source photo rather than spending time forcing the edit to work. The better input is often the most effective “advanced” trick.
For a small creator preparing a post, the art-making option could be useful for exploring a visual direction before building a larger design elsewhere. I’d use it to generate a concept or a distinctive personal image, then judge whether it still communicates the intended subject. If the result is meant to represent a real event accurately, a heavily transformed style may send the wrong signal. AI creativity is most helpful when the audience understands that the image is expressive rather than documentary.
I also recommend deciding on a crop before judging a background edit. A result that feels imperfect in a wide frame may become more coherent when used as a tightly framed avatar, while a close crop can expose details that were previously hidden. This is not a reason to conceal serious errors; it is a way to evaluate the image in the format for which it is actually being made.
Iteration, trade-offs, and alternatives
The main trade-off with AI editing is speed versus precision. A traditional editor usually asks me to make more manual choices, but that control helps with exact cleanup. A simple one-tap filter is faster still, although it generally changes the overall look rather than targeting a face or replacing its surroundings. AI Photo Magic Editor sits between those approaches: it is suited to specific transformations, but I’d still review the result instead of assuming the automation has understood every detail.
When an edit misses the mark, I’d change one thing at a time. If the background feels wrong, try a different source image or a less distracting setting before changing the face as well. If a portrait looks overdone, return to the original and use a lighter approach rather than layering more edits over the first attempt. This keeps cause and effect clear and makes it easier to identify whether the problem comes from the photo, the transformation, or the chosen style.
For a clean, natural headshot, I’d prioritize a good original photo and restrained edits. For a playful post or an image meant to look visibly stylized, I’d be more willing to experiment. If I need fine control, batch consistency across many images, or dependable matching between a set of product shots, I’d compare dedicated manual editing software instead. This app is better suited to individual creative tasks than to a tightly specified production pipeline.
Its version is 1.2.0, and it requires Android 8.0 or later. That makes compatibility worth checking before planning a workflow around it, particularly if an older device is used for photography. I’d also test the app on one nonessential image first, so I can decide whether its editing approach matches my taste before spending time preparing a whole set of pictures.
From finished edit to sharing
Once I have a version I like, I’d check it at the size and in the context where it will be seen. A profile image needs a readable face in a small circle; a post may allow more room for an artistic background. I’d also compare the final against the original to make sure the edit hasn’t changed the subject’s expression or identity in a way I didn’t intend. That last check matters more than adding another effect.
For a creator handing an image to someone else, clarity is part of the finish. I’d keep the untouched source separate from the edited result and label the final version so it is not mistaken for the original. If the picture is for a client or organization, I’d get agreement on whether an AI-altered portrait is acceptable before delivering it. That avoids the awkward situation where a polished image is rejected because the recipient expected a faithful photograph.
I would not rely on this app alone for a project that demands exact output specifications or extensive revision history. In those situations, a more controlled editor and an agreed handoff process are safer. But for a personal portrait, a quick social image, or an exploratory art edit, a lightweight workflow can be enough: keep the source, make a focused change, inspect the edges, and share only the version that still feels intentional.
Who I’d recommend it to
I’d recommend AI Photo Magic Editor to someone who wants to experiment with portraits and backgrounds without first learning a complicated editing interface. It makes the most sense for casual creators, people refreshing a profile image, and anyone curious about turning a regular photo into something more stylized. The free price lowers the barrier to trying it, while the mixed average rating is a reminder to judge the results against your own expectations rather than expecting every transformation to land perfectly.
I’d suggest skipping it if your priority is precise, repeatable retouching or if you need every photo to remain a faithful record. It may also frustrate someone who wants complete manual control over small details. For that person, conventional editing software is a better fit, even if it takes longer. The app’s value is in getting quickly to an interesting possibility, not in replacing every tool a serious editing workflow might require.
My verdict is that this is a practical creative sandbox with a clear use: make a portrait cleaner, change what surrounds the subject, or explore an artistic look. I’d approach it with a good source image and a light hand, then inspect the result before sharing. If you want quick experimentation and can accept that AI edits sometimes need a rethink, it is worth trying; if accuracy and pixel-level control come first, I’d choose a more manual alternative.
A sensible way to test it before committing
I’d start with one photo that is personal enough to make the result meaningful but not so important that a disappointing edit causes trouble. A spare portrait works better for this test than the only copy of a carefully planned shoot. Try the transformation that addresses the clearest issue, then pause before changing anything else. This gives you a fair sense of the app’s style without turning a simple experiment into a long session.
It is also worth asking what “finished” means before editing. For a profile image, the face should read clearly at a small size; for an art-led post, a visible change in style may be a success even if it is not photorealistic. That distinction can prevent unnecessary retries. If the goal is a faithful portrait, an obviously stylized result is not a near miss to fix—it is the wrong direction, and a different tool or source photo may serve you better.
For someone wondering whether it can replace a regular photo editor, I’d say only for a narrow, convenient part of the job. Its appeal is the focused set of AI-led transformations, while manual editors are more suitable when I need predictable adjustments, careful selections, or consistent treatment across a collection. A basic filter is still the quicker choice when all I want is a broad change in tone. Choosing among them by task is more efficient than expecting one app to cover every kind of image work.
For day-to-day use, I’d keep the workflow simple: choose a photo with a distinct subject, make one purposeful edit, check the face and edges at the intended crop, and keep the original nearby. If I’m preparing an image for another person, I’d also confirm that the edited style fits their expectations before treating it as ready to deliver. Those small checks are useful precisely because AI can make a convincing-looking change without knowing the context in which the picture will be used.
The app is therefore easiest to recommend as a low-pressure place to explore a particular portrait or creative idea, rather than as a dependable production system. It can be a good fit when speed and experimentation matter more than detailed control, especially for a personal image that will be shared casually. If you need reliable sameness, exact retouching, or an unchanged record of an event, I’d choose another approach. That boundary is what makes the tool’s strengths clearer, not a reason to expect it to do every editing job.
Pros
- Quickly transforms photos with AI-powered editing tools.
- Useful for creating stylized images without advanced editing skills.
- Offers a convenient way to experiment with different looks.
- Can help enhance portraits and other personal photos.
- Makes creative edits accessible on a mobile device.
Cons
- AI results may not always match the original prompt or desired look.
- Some features or exports may require a paid plan.
- Image quality can vary depending on the source photo.
- Processing may take longer for complex edits or large images.
- Review privacy settings before uploading personal photos.
FAQs for AI Photo Magic Editor
What is AI Photo Magic Editor, and what can it do?
AI Photo Magic Editor is a photo-editing app that uses artificial-intelligence tools to help transform and improve images. Depending on the version available for your device, its features may include automatic enhancements, creative effects, background edits, or other one-tap adjustments. Check the app’s current store listing and in-app feature descriptions before downloading, since tools and capabilities can vary by version, platform, or subscription.
Is AI Photo Magic Editor free to download and use?
The app may be available to download without an upfront charge, but that does not necessarily mean every editing feature is free. Some tools, exports, or other benefits may require a subscription, an in-app purchase, or viewing advertisements. Before starting a trial or confirming a purchase, review the price, billing period, renewal terms, and cancellation instructions shown in your app store and within the app.
Do I need to upload my photos to use the editor?
Whether editing happens on your device or uses online AI processing can depend on the specific feature and app version. Review the app’s privacy policy and the permissions requested during setup to understand how photos and related data are handled. Avoid importing sensitive images until you are comfortable with those terms, and check whether the app provides options to delete uploaded content or manage stored projects.
Can I use AI Photo Magic Editor without an internet connection?
Some basic editing functions may work offline if the necessary tools and image files are stored on your device, while AI-powered features may require an internet connection for processing. Availability can differ by tool, device, and version, so it is best to test offline access before relying on it while traveling or without mobile data. Also consider that downloading effects or saving certain results may require connectivity.
How do I save or share edited images, and will the result keep its original quality?
After editing, look for the app’s save or export controls and review any available settings for image size or file quality. The exported image may differ from the original because of resizing, compression, or the selected effect, and some apps may restrict higher-quality exports to paid plans. Check the preview before saving, and keep an untouched copy of important photos so you can compare or restore the original.


